Computer Cord Management: Keep the Back of Your Desk and Floor Free of Cords and Cables
Don’t you just hate all the messy computer cables and cords and power strips and stuff that is necessary for our office equipment??
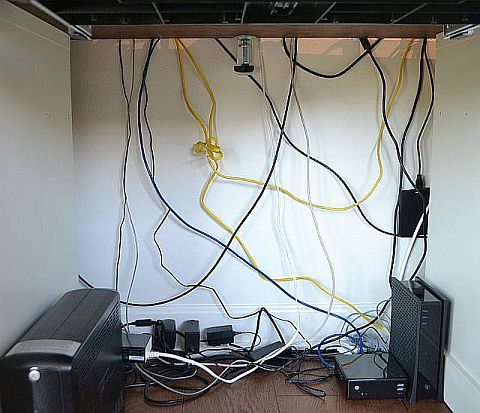
ugly computer cords
I wish I could use a wireless printer for my business.
And have the router tucked away somewhere out of sight.
And a nice streamlined laptop that never needs to be plugged in.
But hey, this is reality.
And the reality for me is — for my business, I need not one, but two hard-wired printers, a document scanner, a desk phone, a cloud back-up device, a battery back-up, a router, a monitor, a keyboard, a mouse — you get the picture. And all that equipment comes with miles and miles of ugly cables and cords.
So that’s what the underside of my desk used to look like.
And now, this is what it looks like.
SO. MUCH. BETTER.
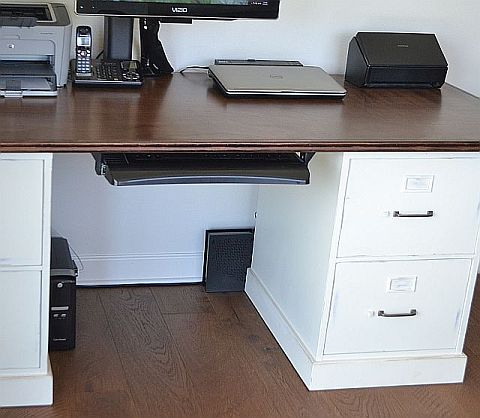
tidy desk
So what made the difference?
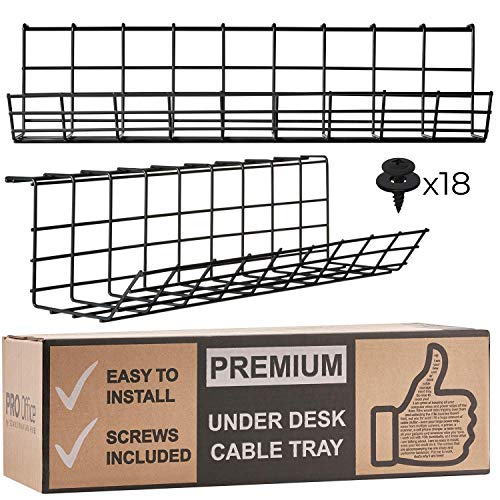
We used an under desk cable tray to hold everything.
There were 2 in the box. We cut one down to fit (easy to do with wire cutters) and mounted them next to each other. They just screwed into the bottom of the desk top. Super easy to install.
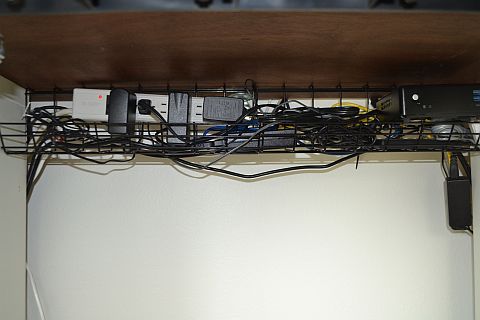
neat computer cables
The trick is to feed all your cables and cords down the back of your desk and then through the back of the basket. Then, once in the tray, wind the cord up into a small bundle then zip-tie or twist-tie it to the tray. I used twist-ties because I wanted to be able to easily undo it if I ever need to move or remove anything.
Once everything is in the tray, plug it all into the power strip. And then put that in the tray. And there you go!
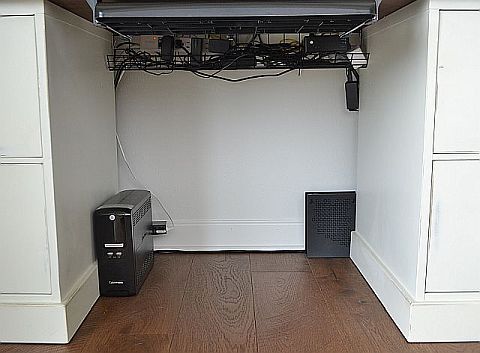
I have a battery back-up (on the left) that needs to sit on the floor and a lot of my equipment plugs into it. So to avoid seeing any dangling cords, I just twist-tied everything together where they come down behind the back of the filing cabinets.
Out of sight.
And my router was too big to fit into the basket so I left it on the floor (on the right). I turned it sideways and tucked it up tight to the back wall. All the cables that plug into it are tied together behind the right filing cabinet.
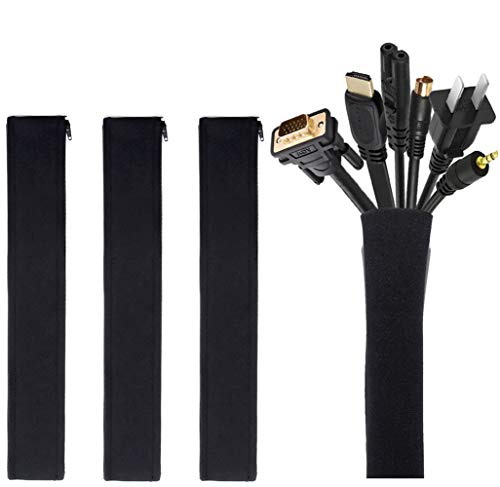
My monitor is mounted on a spring-loaded arm that mounts to the back of the desk top. I wrapped all the cables that go to it in a black cable sleeve and zip-tied it to the arm.
Super easy!

cable sleeve
The hardest part of this whole project was trying to fit under the desk to do all the work!
I got a spasm in my neck because I couldn’t sit up all the way.
And my legs got cramps from being twisted into a pretzel.
And the dog kept trying to get under there with me….

See how to make this desk HERE
But it was worth it because it’s amazing how much cleaner and tidier my whole office feels once I got all that mess off the floor!
SHOP THIS POST

As an Amazon Associate, I earn from qualifying purchases